
I've seen a ton of tutorials on how to make felt trees, including this one, and this one, so I won't go into too much detail since its already been done!
I bought glittery green felt from JoAnn, and one yard was enough to make 2 trees. Yes, this means someone I know is getting the other one for Christmas! :). To make my tree shape, I laid the felt out on the floor (during nap time so the Mouse wouldn't crawl all over it and interrupt), and drew on the non-glittery side with chalk. I had to adjust my lines a few times, but the chalk erases easily.
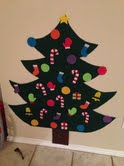
To get the tree somewhat symmetrical, I drew half of it, then folded it over and patted the top so the chalk would transfer. It worked like a charm. I then cut out the tree, and attached half of a brown sheet of felt (also purchased at JoAnn) with hot glue.
To reinforce the edges and give the felt a little more strength, I hot glued pieces of cardboard to the back and nailed it to the wall. I decided on nails because I knew the Mouse would try to pull it off of the wall, but I used really tiny ones so the felt won't have huge holes in it.
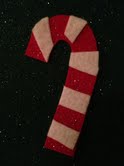
After that, I raided my felt stash and made some ornaments for the tree! I had some white felt that was sticky on one side, which made adding the small details easier. For the rest, I used hot glue again. Since felt sticks to itself, I didn't have to attach anything to the backs of the ornaments and was able to stick them right on.

Happy Crafting!
Lisa
No comments:
Post a Comment